Astrophotography with the Seestar S50: Stacking Images Using Siril
Learn how to stack images from the Seestar S50 using Siril 1.4 and enhance your astrophotography with GIMP in this comprehensive guide.
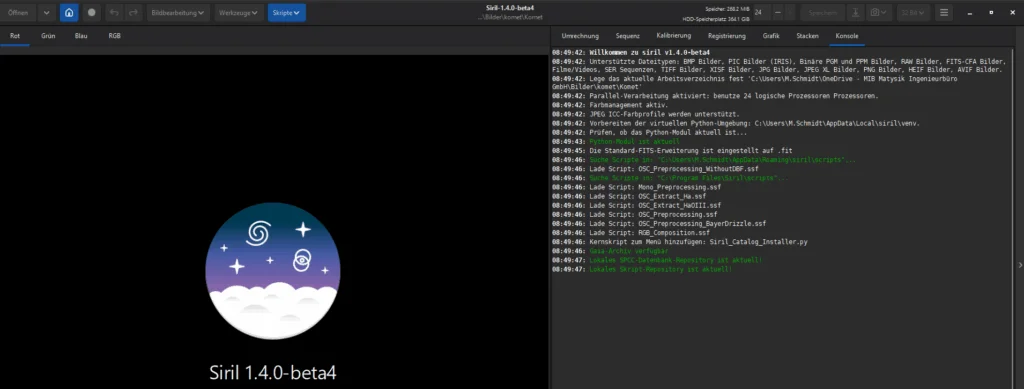
Stacking Images from a Smart Telescope with Siril 1.4 and Subsequent Editing in GIMP
Astrophotography has become more accessible with the introduction of the Seestar S50, which allows enthusiasts to capture their own celestial images without the need for expensive equipment or extensive technical knowledge. While professional gear may yield superior results, the capabilities of the Seestar S50 are sufficient for personal projects, especially when used to enhance observational reports.
Despite being generally satisfied with initial results, there's always room for improvement in astrophotography, particularly through the manual editing of individual frames. This post will guide you through the process of using Siril, a free software that operates seamlessly on Linux, to stack images and refine them for better quality. Understanding the workflow is essential, as all stacking programs require some familiarity with their functions and the sequence of steps involved.
1. Automating with Scripts
Since version 1.4, Siril has supported not only scripts for the stacking process but also Python scripts that can automate additional tasks. These tasks include filtering out satellite trails, reducing noise in images, and enhancing star shapes. To utilize these features, you must first download the necessary scripts from Siril. If you wish to remove stars and later reassemble them, you will also need the StarNet program. Additionally, the GraXpert program is required for further editing. Both programs are available for free download.
To load the scripts in Siril, navigate to "Scripts" → "Load Scripts". In the window that appears, you can select the scripts you wish to use. Here’s a list of essential scripts to load:
- Satellite_Trail_Removal → for removing satellite trails
- GraXpert-AI → for background removal and noise reduction
- AberrationRemover → for optimizing star shapes
- Seestar_Preprocessing → for stacking FITS files from the Seestar
Once you have checked all the necessary scripts, click "Apply" to load them. Keep in mind that some scripts may require additional installation during their first use.

2. Preparing to Use StarNet and GraXpert
Next, you need to integrate the StarNet and GraXpert programs. Download both programs and extract them to a location where you can easily find them later. It is advisable to place them in the same directory as the scripts for convenience. You can find the directory path for your scripts in the "Load Scripts" window.
StarNet can be obtained from its official site, and GraXpert is also available for free.
You must inform Siril of the executable files' locations for both programs. Click on the menu button in the upper right corner and select "Settings". In the settings window, choose "Miscellaneous" from the left navigation menu. Here, you can specify the executable files for StarNet and GraXpert. After completing this step, click "Apply" to save the settings.
3. Stacking the Individual Images
Now we move on to the first processing step: stacking the individual images. This can be conveniently done using the previously downloaded script "Seestar Preprocessing". This script expects the FITS files to be organized in a folder named "lights".
Create a folder named after your object (e.g., NGC 6992) and within it, a subfolder called lights.
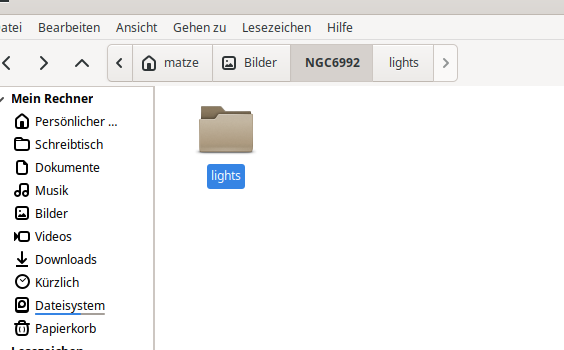
Copy all FITS files of your chosen object from your smart telescope into this directory.
Next, set the working directory in Siril by clicking the house icon in the menu bar and selecting the folder you just created (in this example, NGC 6992).
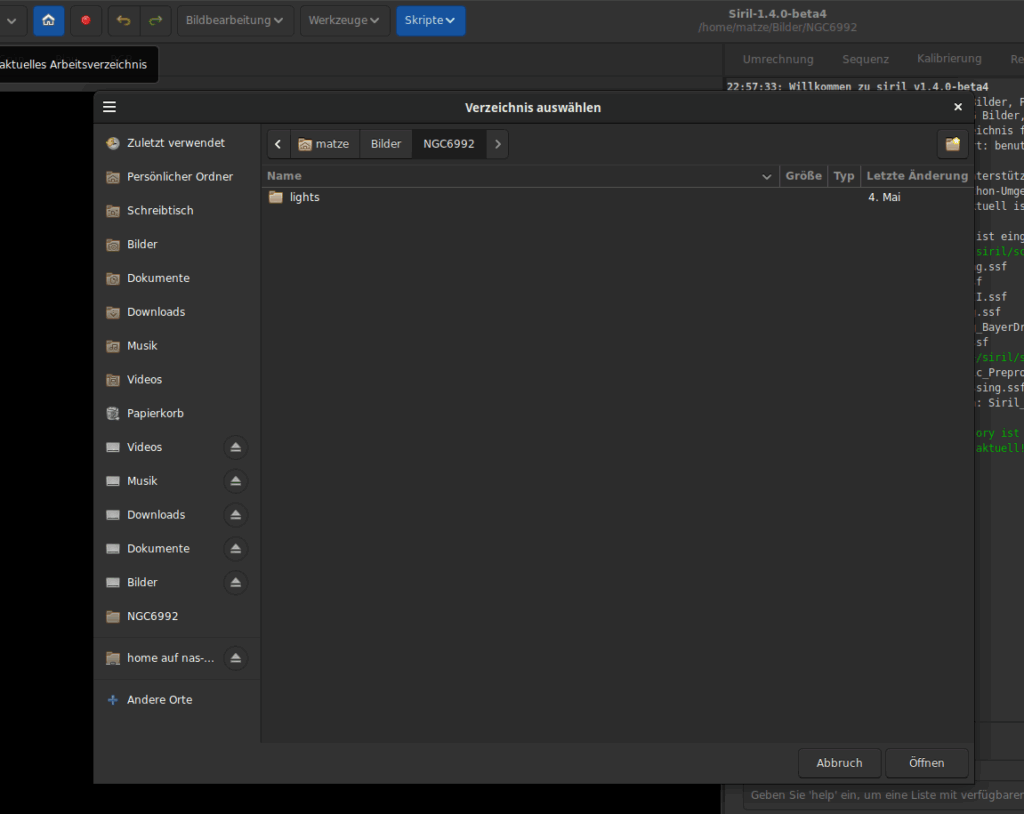
4. Executing the Stacking Script
Now, we will execute the stacking of the individual images. Access the stacking script via "Scripts" → "Siril Script Files" → "Seestar_Preprocessing.ssf".
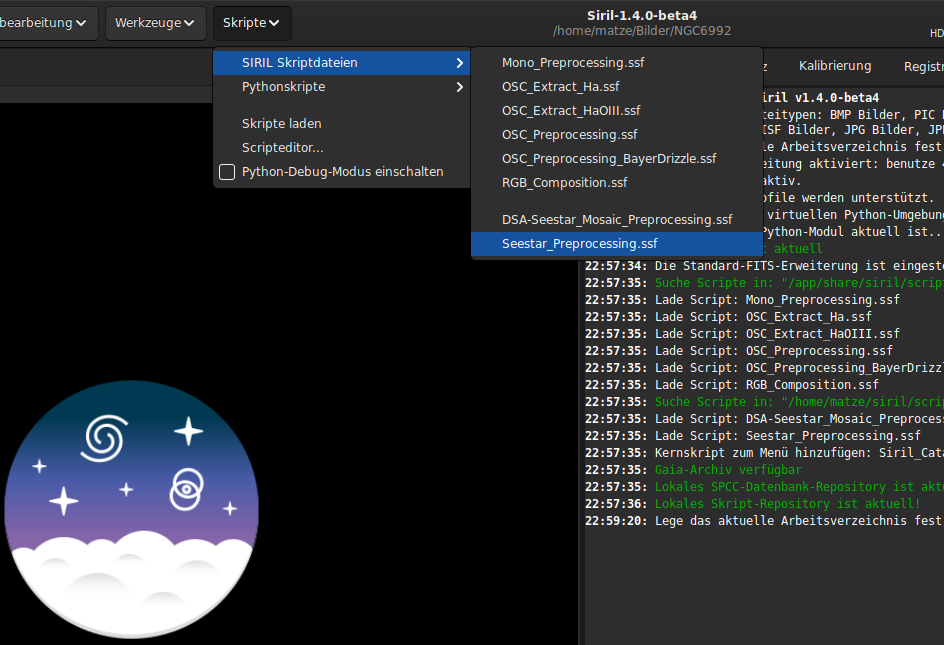
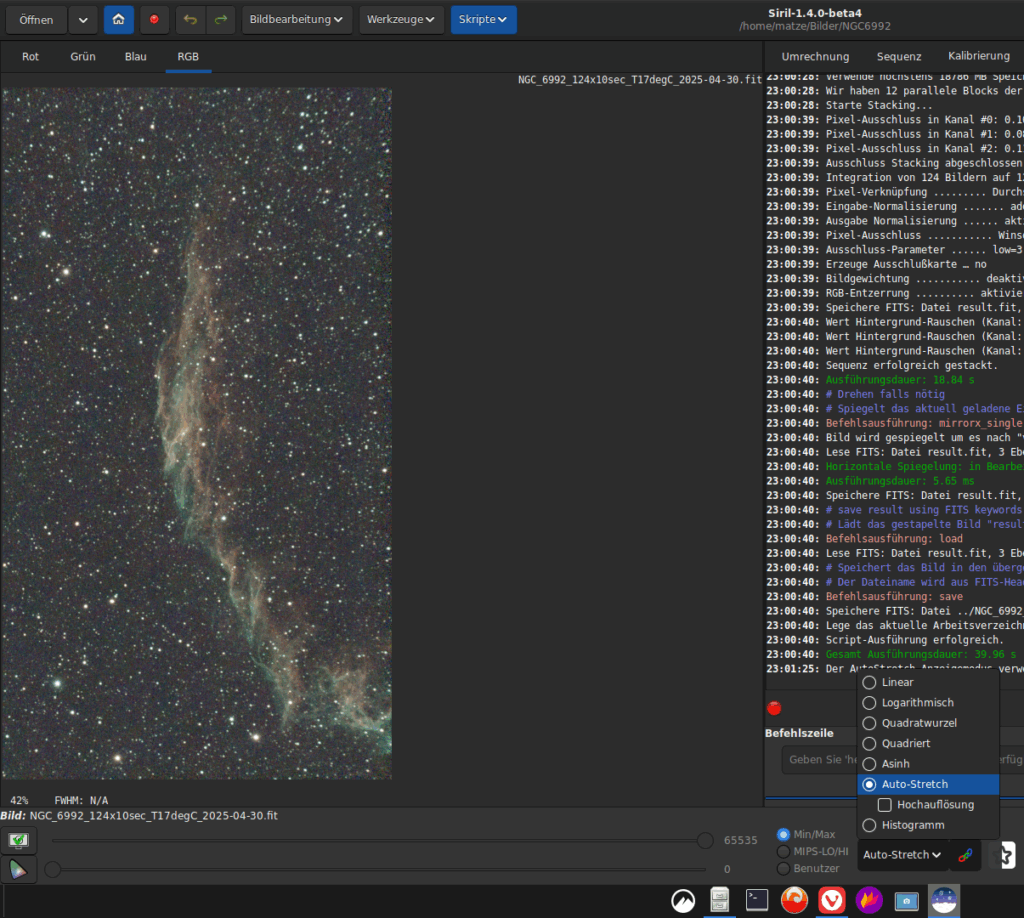
The script will run, which may take some time depending on the number of images processed. At the end, the script should complete without any error messages. Once finished, you will need to open the stacked image, which will initially appear as a black screen.

Post-Processing the Stacked Images in Siril 1.4
After successfully stacking the images, the real editing process begins. At this stage, the resultant image is still linear, very dark, and lacks accurate colors or a uniform background. The following steps will prepare the image for final editing in GIMP.
To make the preliminary stacked result visible, select "Autostretch" in the lower part of the window. This will reveal an initial preview instead of the dark image.
1. Color Calibration
The goal of color calibration is to achieve a natural, color-balanced image. In Siril, color calibration can be performed either automatically or manually. The automatic method now offers two variants: "Photometric" and "Spectrophotometric". The Photometric method utilizes star colors for calibration, while the Spectrophotometric method is based on physical values and provides a more accurate match. Both methods yield good results, so it’s recommended to try both to see which you prefer.
a) Automatic Color Calibration
To use the automatic methods, an "Astrometric Solution" must first be executed. This process matches the image content with data from star catalogs and calculates a mathematical relationship between pixel coordinates (x, y) and celestial coordinates (RA, DE). To perform this step, go to "Tools" → "Astrometry" → "Astrometric Solution".

Enter the object name (e.g., NGC 6992) in the search field at the top left. The other values can remain unchanged. Click "OK" to start the processing. Ideally, this should work on the first attempt.
If Siril cannot assign the image, you will need to perform the color calibration manually. After a successful assignment, go to "Image Processing" → "Color Calibration" and select either "Photometric Color Calibration" or "Spectrophotometric Color Calibration". If you chose the photometric option, simply confirm with "OK". You should then see a visible change in color reproduction.
In the case of the spectrophotometric calibration, there are additional settings. For "White Point Reference", using the value "Average Spiral Galaxy" works best. Ensure to set the sensor type to "Color" and select the camera sensor of the Seestar in the two fields below. You can then confirm with "OK".
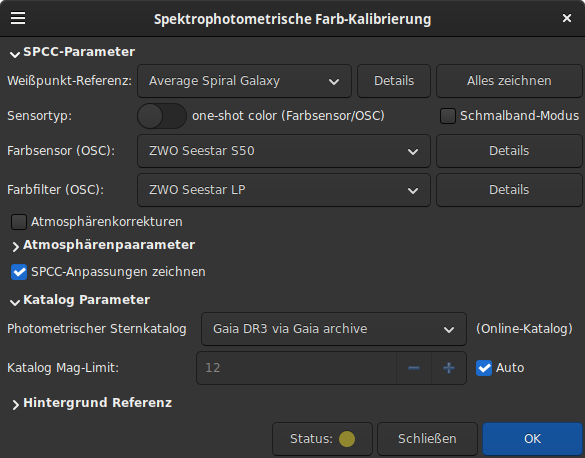
After successful calibration, two windows will display a summary of the white balance adjustments, which can be closed. The color reproduction should now be noticeably improved.
b) Manual Color Calibration
If there is no internet connection or if the automatic calibration fails, manual calibration can be performed. First, select a neutral, dark area in the background...